

Bevy 0.18
Posted on January 13, 2026 by Bevy Contributors

Thanks to 174 contributors, 659 pull requests, community reviewers, and our generous donors, we're happy to announce the Bevy 0.18 release on crates.io!
For those who don't know, Bevy is a refreshingly simple data-driven game engine built in Rust. You can check out our Quick Start Guide to try it today. It's free and open source forever! You can grab the full source code on GitHub. Check out Bevy Assets for a collection of community-developed plugins, games, and learning resources.
To update an existing Bevy App or Plugin to Bevy 0.18, check out our 0.17 to 0.18 Migration Guide.
Since our last release a few months ago we've added a ton of new features, bug fixes, and quality of life tweaks, but here are some of the highlights:
- Atmosphere Occlusion and PBR Shading: The procedural atmosphere now affects how light reaches objects in scenes!
- Generalized Atmospheric Scattering Media: The procedural atmosphere can now be customized, enabling arbitrary atmosphere types: desert skies, foggy coastlines, non-earth-like planets, etc.
- Solari Improvements: Bevy's experimental real-time raytraced renderer has received a ton of new features and improvements.
- PBR Shading Fixes: Some long-standing issues in Bevy's PBR material have been fixed, providing noticeable quality improvements.
- Font Variations: Bevy now supports variable weight fonts, text strikethroughs, underlines, and OpenType font features.
- Automatic Directional Navigation: Bevy UI elements can now opt in to automatic directional navigation, making it easy to navigate UIs with gamepads and keyboards.
- Fullscreen Materials: A new high level material type that makes it easy to define fullscreen post-processing shaders.
- Cargo Feature Collections: Bevy now has high-level scenario-driven Cargo features for things like 2D, 3D, and UI, making it easy to only compile the pieces of the engine your app needs.
- First Party Camera Controllers: Bevy now has built-in basic "fly" cameras and "pan" cameras.
Atmosphere Occlusion and PBR Shading #
The procedural atmosphere now affects how light reaches objects in your scene! Sunlight automatically picks up the right colors as it travels through the atmosphere, appearing orange or red when the sun is closer to the horizon.
This works seamlessly with volumetric fog and all rendering modes, so your scenes will have more cohesive and realistic lighting right out of the box.
Check out the updated atmosphere example to see it in action!

Generalized Atmospheric Scattering Media #

Until now, Bevy's atmospheric scattering system has been fast and beautiful, but not very customizable. There's only a limited number of ways to customize the existing parameters, which constrain the system to mostly earth-like scenes.
Bevy 0.18 introduces a new ScatteringMedium asset for designing atmospheric scattering media of all kinds: clear desert skies, foggy coastlines, and even atmospheres of other planets! We've used Bevy's asset system to the fullest--alongside some custom optimizations--to make sure rendering stays fast even for complicated scattering media.
Solari Improvements #

Solari - Bevy's forward-looking realtime raytraced renderer - has seen many improvements in this release. Notably:
- Support for specular materials and reflections
- Faster-reacting lighting
- A large amount of quality/accuracy improvements
- Physically-based soft shadows for directional lights
- Improved performance on larger scenes
For the full list of details, check out the author's full blog post.
PBR Shading Fixes #
Bevy's PBR material aims to provide a standardized and predictable physical shading model. We landed our initial PBR shader about four years ago. It has generally served us well, and it has improved substantially over time, but it had a couple of quirks that definitely felt ... off at times.
Bevy's materials have sometimes been described as "overly glossy" or "overly bright", and people who knew a bit more about shaders often blamed someone named Fresnel. Fortunately, we've finally isolated the core problems and fixed them. The results should hopefully speak for themselves!
Drag this image to compare


There were two core issues:
- Point/area lights had an overly bright specular component.
- Our "environment map light" shader was doing "roughness dependent fresnel", as defined here. This generally did not behave the way we wanted it to, so we switched to the more direct approach ... using the "typical" fresnel term directly.
For more comparison images, see the two linked PRs above. We can all rest easy now. Fresnel cannot hurt us anymore.
Fullscreen Material #
In previous versions of Bevy, the only way to define custom fullscreen effects was to define a new low-level render feature. This approach is maximally flexible, but it also sets the complexity bar overly high for common use cases.
To resolve this, we introduced a new high level FullscreenMaterial trait and FullscreenMaterialPlugin that let you easily run a fullscreen shader and specify the order it will run relative to other render passes in the engine.
Check out our new fullscreen_material example for a complete illustration of a "chromatic aberration" fullscreen material:
More Standard Widgets #
We are continuing to flesh out the collection of standard widgets first introduced in Bevy 0.17. Note that Bevy's standard widgets are "logical widgets". They are "unthemed".
Popover #
The Popover component can be placed on an absolutely-positioned UI node to provide automatic popup positioning. This is inspired by the popular floating-ui npm package.
Popovers will be placed relative to an anchor element, and positioned so that they don't get cut off by the window edge. You can specify a list of preferred "placements": top, bottom, left or right, along with alignment options for each. If the popup is so large that it's impossible to position it without it getting cut off, it will choose the placement that results in the most visibility (as determined by the area cut off). (A future version might also have an option to constrain the popup to be no larger than the window size, but this will be more useful once we have better support for scrolling.)
This automatic positioning is dynamic, which means that if the anchor element moves around, is inside a scrolling container, or the window is resized, the popover may "flip" sides in order to remain fully visible.
Popovers can be used for dropdown menus, but they can also be used for tooltips.
Menu #
The MenuPopup component uses Popover to provide a dropdown menu widget. This adds events for opening and closing the menu, along with keyboard navigation and activation using the focus system.
Improvements to RadioButton and RadioGroup #
Following user testing, we've improved the details of our existing RadioButton and RadioGroup widgets, in a fully backward compatible way:
- Event propagation from user interactions will now be canceled even if widgets are disabled. Previously, some relevant event propagation was not properly canceled.
RadioButtonnow emits aValueChange<bool>entity event when checked, even when checked via aRadioGroup. Consistent with otherCheckablewidgets. As aRadioButtoncannot be unchecked through direct user interaction with this widget, aValueChangeevent with valuefalsecan not be triggered forRadioButton.- If a
RadioButtonis focusable, a value change event can be triggered using the Space or Enter keys when focused. RadioGroupis now optional and can be replaced with a custom implementation.
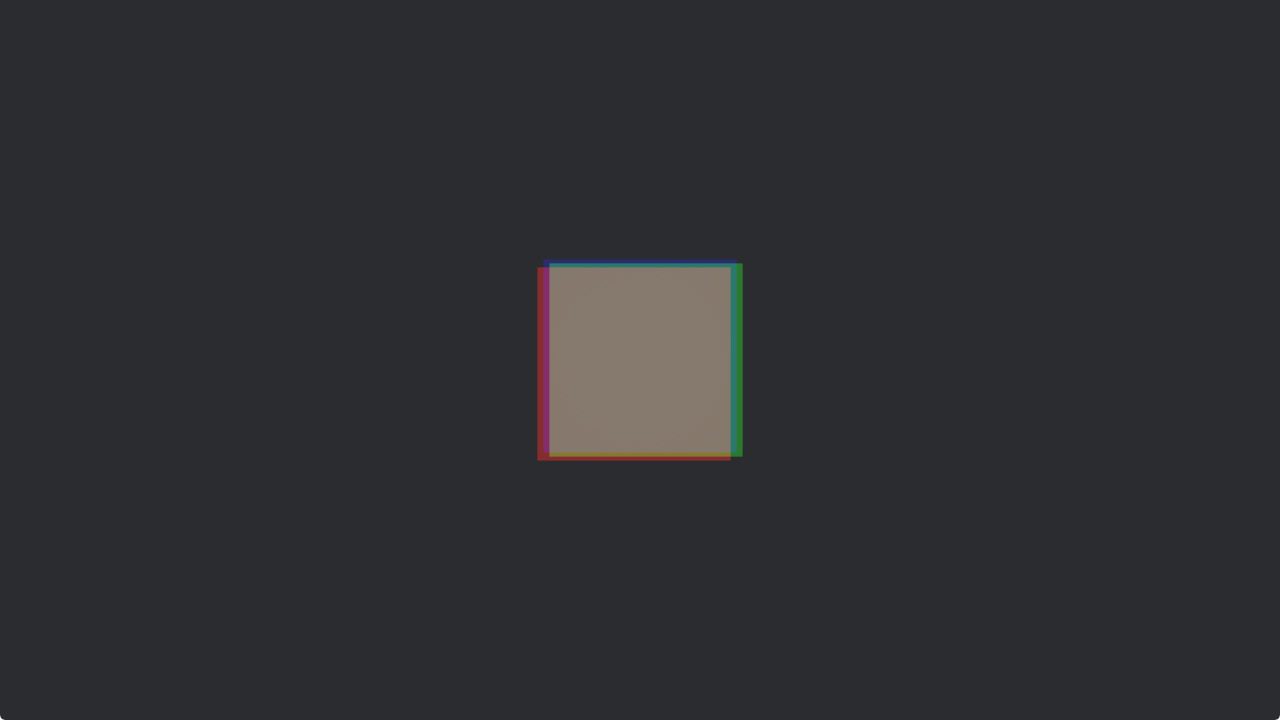
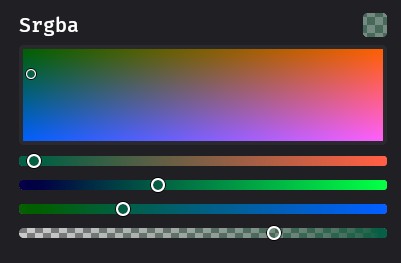
Bevy Feathers Widget: Color Plane #
In our last release we introduced Bevy Feathers, an experimental new widget library for building tooling (such as the upcoming Bevy Editor).
In Bevy 0.18 we've added the ColorPlane widget: a two-dimensional color picker that allows selecting two different channels within a color space, one along the horizontal axis and one along the vertical. It can be configured to display a variety of different color spaces: hue vs. lightness, hue vs. saturation, red vs. blue, and so on.
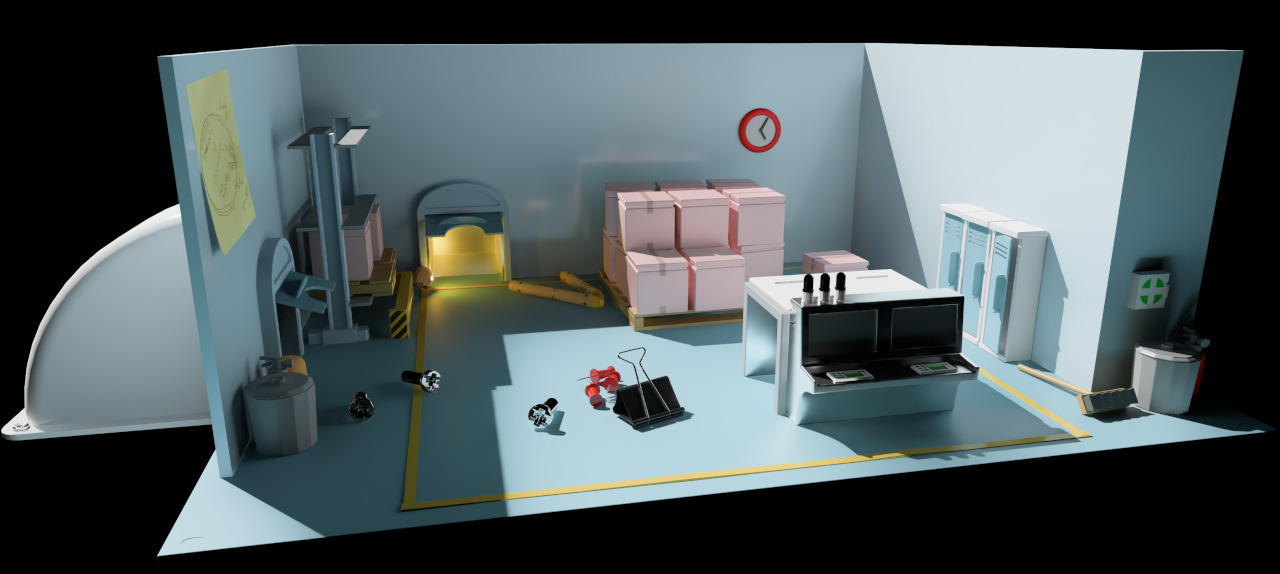
First-Party Camera Controllers #
To understand and interact with a scene, you must look at it through the lens of a camera. But there are many ways to control a camera!
Getting camera controllers feeling right is both tricky and essential: they have a serious impact on both the feeling of your game and the usability of your software.
Historically, Bevy has left this entirely up to individual game developers: camera controllers require deep customization and endless twiddling. However, Bevy as a game engine needs its own camera controllers: allowing users to quickly and easily explore scenes during development (rather than gameplay).
To that end, we've created bevy_camera_controller: giving us a place to store, share, and refine the camera controllers that we need for easy development, and yes, an eventual Bevy Editor. We're kicking it off with a couple of camera controllers, detailed below. These are unlikely to be useful for normal game logic, but they are great for debugging and building tooling. Their code can also be copied and used as a baseline for game-specific camera logic!
FreeCamera #
The first camera controller that we've introduced is a "free camera", designed for quickly moving around a scene, completely ignoring both physics and geometry. You may have heard of a "fly camera" controller before, which is a specialization of a "free camera" controller designed for fast and fluid movement for covering large amounts of terrain.
Many Bevy examples now use FreeCamera, including the solari example (which demos Bevy's experimental raytraced renderer):
To add a free camera controller to your project (typically under a dev_mode feature flag), add the FreeCameraPlugin and the FreeCamera component to your camera entity.
To configure the settings (speed, behavior, keybindings) or enable / disable the controller modify the FreeCamera component. We've done our best to select good defaults, but the details of your scene (especially the scale!) will make a big difference to what feels right.
PanCamera #
The PanCamera controller is a simple and effective tool designed for 2D games or any project where you need to pan the camera and zoom in/out with ease. It allows you to move the camera using the WASD keys and zoom in and out with the mouse wheel or +/- keys.
By adding the PanCameraPlugin and attaching the PanCamera component to your camera entity, you can quickly add this controller to your project.
To configure the camera's zoom levels, speed, or keybindings, simply modify the PanCamera component. The default settings should work well for most use cases, but you can adjust them based on your specific needs, especially for large-scale or high-resolution 2D scenes.
Automatic Directional Navigation #
Bevy now supports automatic directional navigation for UI elements! With a bit of global setup, all of your UI elements can now be navigated between using gamepads or arrow keys. No more tedious manual wiring of navigation connections for your menus and UI screens.
Previously, creating directional navigation for UI required manually defining every connection between focusable elements using DirectionalNavigationMap. For dynamic UIs or complex layouts, this was time-consuming and error-prone.
Now, you can simply add the AutoDirectionalNavigation component to your UI entities, and Bevy will automatically compute navigation connections based on spatial positioning. The system parameter intelligently finds the nearest neighbor in each of the 8 compass directions (North, Northeast, East, etc.), considering:
- Distance: Closer elements are preferred
- Alignment: Elements that are more directly in line with the navigation direction are favored
- Overlap: For cardinal directions (N/S/E/W), the system ensures sufficient perpendicular overlap
How to Use It #
Simply add the AutoDirectionalNavigation component to the UI entities you want users to be able to navigate between:
commands.spawn;
To leverage automatic navigation, use the AutoDirectionalNavigator system parameter instead of the DirectionalNavigation system parameter:
Configuration #
You can tune the behavior using the AutoNavigationConfig resource:
app.insert_resource;
Manual Override #
Automatic navigation respects manually-defined edges. If you want to override specific connections (e.g. screen-edge looping), you can still use DirectionalNavigationMap::add_edge() or add_symmetrical_edge(), and those connections will take precedence over the auto-generated ones. You may also call auto_generate_navigation_edges() directly, if you have multiple UI layers (though may not be widely used)
Cargo Feature Collections #
Historically, Bevy developers have lived one of two lifestyles:
- Use all of Bevy's default features, potentially compiling many unwanted or unneeded features.
- Disable Bevy's default features and manually define the complete list of features.
Living in the world of (2) was an exercise in frustration, as the list of bevy features is massive and the features required to accomplish a given task changes regularly across releases. This was an expert level task that required intimate knowledge of engine internals to get right.
Bevy 0.18 introduces high-level "cargo feature collections" to the bevy crate: 2d, 3d, and ui. This enables developers to easily select the kind of app they want to build, and only compile the pieces of Bevy needed for that app.
This means scenarios like using Bevy as a UI framework, without pulling in the rest of the engine, are now as easy as:
= { = "0.18", = false, = ["ui"] }
We've also added mid-level feature collections like 2d_api, which is Bevy's 2D API without the default Bevy renderer. This makes it much easier to swap out the default Bevy renderer for a custom one.
For example, the 2d profile looks like this:
= [
"default_app",
"default_platform",
"2d_api",
"2d_bevy_render",
"ui",
"scene",
"audio",
"picking",
]
Someone building a custom 2D renderer now just needs to remove 2d_bevy_render and provide their own.
Developers can now define their own high-level cargo feature profiles from these mid-level pieces, making it much easier to define the subset of Bevy you want to build into your app.
Font Variations #
Bevy 0.18 brings more control over how your fonts are expressed!
Text Strikethroughs and Underlines #
bevy_text now supports strikethrough and underline. To display text with strikethrough or underline, just add the Strikethrough or Underline components to any Text, Text2d, or TextSpan entity. You can set colors for strikethrough and underline using the StrikethroughColor and UnderlineColor components, respectively.
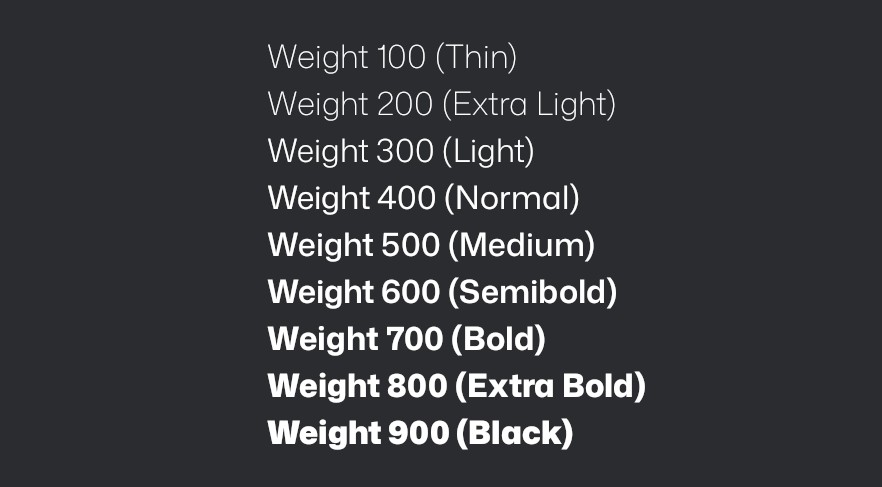
Font Weights #
Bevy now supports font weights, allowing you to take advantage of variable weight fonts which embed smooth variations of a font into a single file! TextFont now has a weight: FontWeight field. FontWeight newtypes a u16 (clamped to a range of 1-1000), with lower values representing thin typefaces and large values representing bold typefaces.
OpenType Font Features #
OpenType font features allow fine-grained control over how text is displayed, including ligatures, small caps, and many more.
These features can now be used in Bevy, allowing users to add typographic polish (like discretionary ligatures and oldstyle numerals) to their UI. It also allows complex scripts like Arabic or Devanagari to render more correctly with their intended ligatures.
Example usage:
commands.spawn;
FontFeatures can also be constructed from a list:
TextFont
Note that OpenType font features are only available for .otf fonts that support them, and different fonts may support different subsets of OpenType features.
Pick-able Text Sections #
Individual text sections belonging to UI text nodes are now pickable, allowing them to be selected, and can be given observers to respond to user interaction.
This functionality is useful when creating hyperlink-like behavior, and allows users to create mouse-over tooltips for specific keywords in their games.
Safe Mutable Access To Multiple Arbitrary Components #
When working with an ECS, the most efficient way to access data is to query the same components across multiple entities in a batch:
for in &mut query
But in some scenarios, users want to access multiple arbitrary components for specific entities:
let = entity.?;
This approach is similar to the traditional "game object" model that users may be familiar with in other game engines, and can be particularly useful when implementing complex, non-performance-critical logic. It also tends to mesh better with other languages and external tools, making it a tempting design for scripting, modding and integration work.
In theory, this style of access is fairly straightforward: access the components and ensure we don't break Rust's mutable aliasing rules. Initial attempts at implementing this ran into some difficulty though, with subtle soundness problems detected during code review. As a result, we previously introduced unsafe methods for this: get_components_mut_unchecked. These methods are relatively fast due to the skipped aliasing checks, but unsafe is frightening and cumbersome to work with, particularly for an API that's designed for convenience and often most attractive to newcomers.
In Bevy 0.18, we're finally introducing safe equivalents, in the form of EntityMut::get_components_mut and EntityWorldMut::get_components_mut:
let = entity.?;
These methods allow you to access multiple mutable or imutable references to the components on a single entity. To ensure that we don't hand out multiple mutable references to the same data, these APIs use quadratic time complexity (over the number of components accessed) runtime checks, safely erroring if illegal access was requested.
Quadratic time complexity is bad news, but in many cases, the list of components requested is very small: two, three or even ten distinct components are not terrible to check outside of a hot loop. However, some applications (such as scripting interfaces) may still be best suited to using the unsafe API, relying on other methods to ensure soundness with a lower performance cost.
glTF Extensions #
glTF is a popular open format for 3D models and scenes, and serves as Bevy's primary 3D format. When making games however, simply relying on the built-in data fields for your objects is not enough. Additional information like physics colliders or special rendering properties are typically best kept directly with the models.
glTF has two mechanisms for extending glTF files with additional user data: extras and extensions.
Extras are meant to be arbitrary application-specific data, often authored by users directly in tools like Blender's custom properties. Extras are historically well supported by Bevy; if you add a custom property in Blender that data will end up in one of the GltfExtras components on the relevant entity.
Extensions are meant for data that can be shared across applications. They are more flexible, allowing for new data in more places inside a glTF file, and more powerful as a result. Extensions can add new object types, such as lights from the KHR_lights_punctual extension, as well as arbitrary buffers, data that is at the root of the glTF file, and more.
Prior to 0.18, the code to handle extensions like KHR_lights_punctual was hardcoded into Bevy's glTF loader. Now, users may implement the GltfExtensionHandler trait to do stateful processing of glTF data as it loads.
Processing extension data is only half the story here because to process extension data you also have to be able to process the non-extension data like meshes, materials, animations, and more.
Extension handlers can be written for wide variety of use cases, including:
- Insert Bevy Component data on entities
- Convert all
Mesh3dcomponents toMesh2d - Build
AnimationGraphs and insert them on animation roots - Replace
StandardMaterialwith custom materials - Insert lightmaps
We've added two new examples to show off common use cases:
gltf_extension_animation_graphbuilds anAnimationGraphand inserts it onto the animation root in a Scene, which means it is now accessible to play animations using theAnimationPlayeron the same entity later when that scene is spawned.gltf_extension_mesh_2duses aGltfExtensionHandlerto switch the 3d mesh and material components for their 2d counterparts. This is useful if you're using software like Blender to build 2d worlds.
Integration with external authoring tools #
Extensions typically require an application that is producing the data as well as consuming the data.
For example, Skein defines a glTF extension that allows adding Bevy Components to glTF objects. This is most commonly produced by Blender and consumed by Skein's GltfExtensionHandler in Bevy. These components are then inserted on entities in a scene at the same time built-in components like Transform and Mesh3d are.
Using glTF Extensions for this data means that other level editors like Trenchbroom can also write the same format to glTF files. Any third party software that writes component data into a glTF file can use Skein's GltfExtensionHandler, resulting in components being "ready-to-go" when spawning Scenes.
Short-Type-Path Asset Processors #
Asset processors allow manipulating assets at "publish-time" to convert them into a more optimal form when loading the data at runtime. This can either be done using a default processor, which processes all assets with a particular file extension, or by specifying the processor in the asset's meta file.
In previous versions of Bevy, the processor had to be fully specified in the asset's meta file. For example:
As you can see, processor types can be very verbose! In order to make these meta files easier to manipulate, we now also support using the "short type path" of the asset. This would look like:
Easy Screenshot and Video Recording #
Making an awesome, beautiful game is only half the battle: you need to be able to show it to people too!
Bevy has been able to take a screenshot of what's rendered since 0.11. Despite how useful this functionality is for quickly creating marketing material, setting it up was relatively involved.
This process has been streamlined, with the new EasyScreenshotPlugin allowing you to take a screenshot with consistent formatting with a single button press. With its default settings, once you add this plugin to your application, a PNG screenshot will be taken when you press the PrintScreen key. You can change the trigger key, or the screenshot format between PNG, JPEG or BMP.
We've taken this one step further, allowing you to record video directly from Bevy, with the new EasyScreenRecordPlugin. This plugins add a toggle key, space bar by default, that will toggle screen recording. Recording can also be started and stopped programmatically with the RecordScreen messages.
Screen recording is currently not supported on Windows due to challenges with video codecs. While all dev-tools features are off-by default, screen recording is a bit trickier to activate due to this limitation. To enable it, toggle the screenrecording feature in the bevy_dev_tools crate.
Remove Systems from Schedules #
Previously, the only way to prevent a scheduled system from running was to use run conditions. This works well for dynamically toggling whether or not a system runs, but comes with a tiny overhead each time the schedule is run.
Now, you can completely remove systems from a schedule using remove_systems_in_set forcing an expensive schedule rebuild but removing that overhead completely and removing the systems from any debug tools.
Run conditions (and dedicated schedules run on demand) remain a better tool for most cases, but completely removing systems may be an attractive option when opting-out of undesired plugin behavior, modding or changing game settings.
app.add_systems;
// remove a system
schedule.remove_systems_in_set;
// remove systems in a set
app.remove_systems_in_set;
UI Nodes Can Ignore Parent Scroll Position #
We've added the IgnoreScroll component, which controls whether a UI element ignores its parent’s ScrollPosition along specific axes.
This can be used to achieve basic sticky row and column headers in scrollable UI layouts. See the scroll example for a demonstration!
Interpolation for Colors and Layout #
Bevy's StableInterpolate trait is a lovely foundation for animation, but sadly there's one important type that it doesn't work with: the Val type from bevy_ui, used to control the layout of UI elements. Val is an enum, representing different length units such as pixels and percentages, and it's not generally possible or even meaningful to try and interpolate between different units.
However, it's common to want to animate Val in a way that doesn't require mixing units: often we just want to slide or stretch the length of a widget such as a toggle switch. We can do this so long as we check at runtime that both interpolation control points are in the same units.
The new TryStableInterpolate trait introduces the idea of interpolation that can fail, by returning a Result. Note that "failure" in this case is not necessarily bad: it just means that the animation player will need to modify the parameter in some other way, such as "snapping" or "jumping" to the new keyframe without smoothly interpolating. This lets us create complex animations that incorporate both kinds of parameters: ones that interpolate, and ones that don't.
We've added a blanket implementation of TryStableInterpolate for all types that impl StableInterpolate, and these can never fail. There are additional impls for Color and Val, which can fail if the control points are not in the same units / color space.
Seekable Asset Readers #
In Bevy 0.15, we replaced the AsyncSeek super trait on Reader with AsyncSeekForward. This allowed our Reader trait to apply to more cases (e.g., it could allow cases like an HTTP request, which may not support seeking backwards). However, it also meant that we could no longer use seeking fully where it was available.
In Bevy 0.18, we've made our Reader trait upgrade-able to SeekableReader, in cases where the asset source supports it.
let seekable_reader = reader.seekable?;
seekable_reader.seek.await?;
This enables an AssetLoader that needs seeking to either fail, or select a suitable fallback behavior for its use case (such as reading into a Vec, which is seekable).
Support Bevy #
Bevy will always be free and open-source, but it isn't free to make! Because Bevy is free, we rely on the generosity of the Bevy community to fund our efforts. If you are a happy user of Bevy or you believe in our mission, please consider donating to the Bevy Foundation... every bit helps!
Contributors #
A huge thanks to the 175 contributors that made this release (and associated docs) possible! In random order:
- @df51d
- @nicebenny23
- @NicoZweifel
- @martinstarman
- @robtfm
- @chescock
- @mersenne-twister
- @CorvusPrudens
- @MichalGniadek
- @kaoet
- @lizelive
- @joseph-gio
- @SludgePhD
- @mockersf
- @rparrett
- @DaAlbrecht
- @NiseVoid
- @moe-moe-pupil
- 0xfff
- Mushine Lament
- @alice-i-cecile
- @IceSentry
- @WaffleLapkin
- @villor
- @ThierryBerger
- @rudderbucky
- @raldone01
- @rlneumiller
- Ivar Källström
- @WireWhiz
- @Shatur
- @venhelhardt
- @syszery
- @chocolacula
- @fundon
- @ElliottjPierce
- @ecoskey
- @SpecificProtagonist
- @jamescarterbell
- @james7132
- @Zeophlite
- @SkiFire13
- @benfrankel
- @jasmine-nominal
- @dubrowgn
- @Sigma-dev
- @databasedav
- @rectalogic
- @mnmaita
- @mrtracy
- @mate-h
- @it-me-joda
- @onkoe
- @andriyDev
- @shunkie
- @kfc35
- @MushineLament
- @rossleonardy
- @serephus
- @Rajveer100
- @z-jxy
- @SarthakSingh31
- @PPakalns
- @BD103
- @Zeenobit
- @Trashtalk217
- @mirsella
- @sroauth
- @re0312
- @shoobooshooboo
- @JMS55
- @grind086
- @jakobhellermann
- @diyu-motif
- @Leinnan
- @natepiano
- @Architector4
- @Glory2Antares
- @kpreid
- @oliver-dew
- @Rodhlann
- @TeamDman
- @momoluna444
- @Nilirad
- @NiklasEi
- @akimakinai
- @Saphereye
- @janis-bhm
- @Saratii
- @DuckyBlender
- @johannesvollmer
- @shanecelis
- @apekros
- @kristoff3r
- @panpanpro888
- @bushrat011899
- @viridia
- @jbuehler23
- @ItsDoot
- @dependabot[bot]
- @insprac
- @HeartofPhos
- @ashivaram23
- @laundmo
- @KirmesBude
- @cart
- @LeandroVandari
- @Lyndon-Mackay
- @bilsen
- @torsteingrindvik
- @lynn-lumen
- @atlv24
- @pcwalton
- @ekwoka
- @ChristopherBiscardi
- @bonsairobo
- @mrchantey
- @isHavvy
- @ickshonpe
- @valenotary
- @noahsabaj
- @zacryol
- @uckelman
- @SparkyPotato
- @VasanthakumarV
- @WaterWhisperer
- @hymm
- @newDINO
- @xyrar
- @LikeLakers2
- @rmsthebest
- @tychedelia
- @baozaolaoba-top
- @2ne1ugly
- @urben1680
- @janhohenheim
- @tigregalis
- @PhantomMorrigan
- @IQuick143
- @AcrylonitrileButadieneStyrene
- @dloukadakis
- @Niyudi
- @yh1970
- @Mysvac
- @Lancelotbronner
- @JeroenHoogers
- @cBournhonesque
- @snk-git-hub
- @JonasJebing
- @beicause
- @pine-free
- @JaySpruce
- @bieyuanxi
- @hansler
- @EmbersArc
- @Syynth
- @greeble-dev
- @aevyrie
- @samoylovfp
- @Lampan-git
- @mgi388
- @MarcGuiselin
- @NthTensor
- @eugineerd
- @bloopyboop
- @andrewhickman
- @JMLX42
- @doup
- @DeVelox
- @jannik4
- @ejrh
- @jf908
- @Breakdown-Dog
- @Bleachfuel
- @hukasu
For those interested in a complete changelog, you can see the entire log (and linked pull requests) via the relevant commit history.